
How To Finger Drum: The Complete Beginner Tutorial
Oct 03, 2022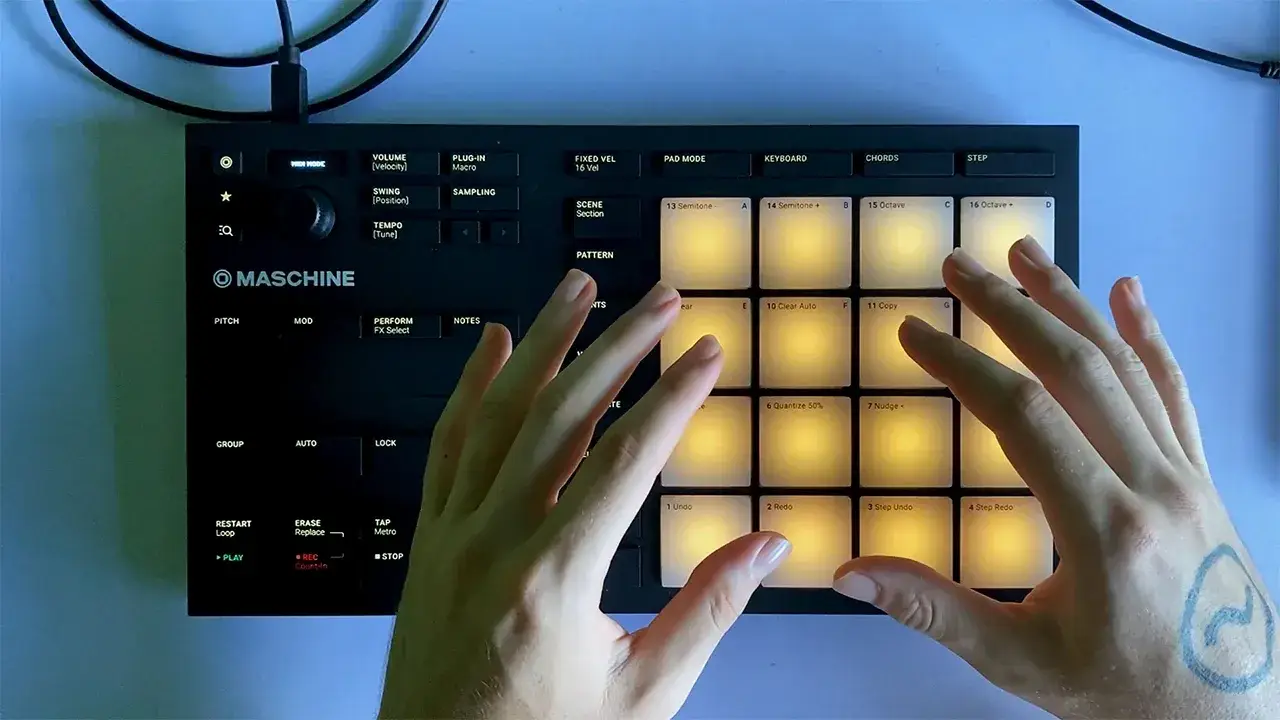
Finger drumming is the art of playing drum parts in real time on a pad controller. Instead of programming every note into a grid, you use your fingers to perform the kick, snare, hi-hat, cymbals, and toms like the different parts of an acoustic drum set.
You do not need previous drumming experience to start. You need a responsive MIDI pad controller, realistic drum sounds, a consistent pad layout, and a simple way to practice the different parts of a groove one piece at a time.
This tutorial will help you set up those foundations and play your first musical beat.
What do you need for finger drumming?
Your basic setup has two parts:
- A velocity-sensitive pad controller with pads that respond differently depending on how softly or loudly you play them.
- Drum software that turns the controller's MIDI notes into actual drum sounds.
A 4x4 controller with 16 pads is ideal because it gives you enough room for a complete drum kit without forcing you to switch between different pad pages in the middle of a performance.
I have used the Maschine Mikro for many years because the pads are large, sensitive, and consistent. But you do not need that exact controller. If the equipment you already own has responsive velocity-sensitive pads, you can learn the same underlying skills with it.
For software, I prefer a realistic acoustic drum program with several versions of the same instrument: closed, open, and pedal hi-hats; different snare articulations; multiple toms and cymbals; and a wide range between soft and loud samples. Addictive Drums is my main recommendation, although there are plenty of other programs that can work. Steven Slate Drums has a totally free version, and I have a full setup walkthrough for that included in my complete finger drumming course bundle.
Choose one useful pad layout
A pad layout is simply the arrangement of your drum sounds across the controller.
The most important thing is not finding a magical layout. It is choosing a layout whose logic makes sense, then leaving it alone long enough for your hands to build muscle memory.
My layout is based on the jobs of an acoustic drummer:
- The dominant hand keeps the repeating pulse on the hi-hat or ride.
- The non-dominant hand divides the kick and snare between separate fingers.
- The toms run from high to low across one row.
- The crash and ride cymbals sit across the top.
This does not copy the physical shape of an acoustic kit exactly. A flat controller is a different instrument. Instead, it preserves the musical relationships between the parts while making them comfortable to play with two hands.
See my complete 16-pad finger drumming layout here.
Set up your pads for dynamics
Before learning a beat, make sure you can play the same pad at several clear volume levels.
Tap a snare very softly. Then play a normal stroke. Then play a strong accent. You should hear three noticeably different results, and the quietest stroke should still trigger reliably.
If soft notes disappear, raise the pad sensitivity or adjust the velocity curve. Keep fixed velocity turned off during normal practice. Fixed velocity can be convenient when producing music, but it removes much of the expression that makes performed drums sound human.
Play your first finger drumming beat
Start with a basic rock or hip-hop groove. Count eighth notes out loud:
1 and 2 and 3 and 4 and
Step 1: Play the hi-hat pulse
Use the middle finger of your dominant hand to play the closed hi-hat on every number and every “and.” Keep the notes evenly spaced and relaxed.
Practice this alone until it feels automatic. The hi-hat is the timeline that holds the rest of the groove together.
Step 2: Add the snare
Use the index finger of your non-dominant hand to play the snare on beats 2 and 4.
Do not think of this as a pattern you must memorize forever. You are learning a principle: one hand can maintain a steady pulse while the other adds important accents.
Step 3: Add the kick
Use the middle finger of your non-dominant hand to play the kick on beats 1 and 3.
Now the same hand is responsible for both kick and snare, but two separate fingers control them. This is the beginning of finger independence.
If the groove falls apart when you add the kick, remove it and rebuild the beat. There is nothing wrong with taking one layer away. Good practice means finding the part you cannot control yet and making the problem simpler.
Do not stop at copying the beat
The first beat is only a way to understand the roles of the instruments. The real goal is to use those roles musically.
Once the basic version feels comfortable, change one thing at a time:
- Move one kick to a different eighth note.
- Leave one hi-hat out and notice how the space feels.
- Play a quiet snare note between the backbeats.
- Open the hi-hat briefly, then close it again.
- Replace one measure of the groove with a simple fill.
You are not trying to collect hundreds of patterns. You are learning how a pulse, accents, dynamics, and space work together. When you understand those principles, you can create your own beat instead of needing someone else to tell you every note.
Practice timing and feel
Use a metronome, but do not treat it like a machine you have to fight. The click is a reference point that helps you hear whether your notes are steady.
Start at a tempo where your hands feel relaxed. Record yourself playing for a minute, then listen back without watching the pads. Ask yourself:
- Does the hi-hat remain even?
- Do the snare accents feel confident?
- Are the quiet notes actually quiet?
- Does the groove breathe, or does every space get filled?
- Can I return to beat 1 after a variation?
Those questions are more useful than asking whether you copied a demonstration perfectly.
A simple 15-minute beginner practice session
- Three minutes: Play a steady hi-hat pulse at a comfortable tempo.
- Three minutes: Add snare accents while keeping the pulse unchanged.
- Three minutes: Divide kick and snare between two fingers of the non-dominant hand.
- Three minutes: Play the groove at soft, medium, and loud levels.
- Three minutes: Keep the basic roles but invent your own small variations.
If something becomes tense or sloppy, slow down. Speed is the result of control, not the starting point.
Common beginner mistakes
Changing the layout too often
Every layout feels unfamiliar at first. Give one sensible arrangement enough time to become natural before deciding it does not work.
Using only the index fingers
Index fingers feel strongest, so beginners tend to use them for everything. Start dividing sounds between fingers early. That gives you more independence later.
Playing too fast
Fast, uneven notes do not build useful technique. Choose a tempo where you can hear and control every stroke.
Ignoring dynamics
A correct rhythm at one constant velocity sounds programmed. Practice soft notes, normal strokes, and harder accent hits from the beginning. Variation is natural and it's part of what makes finger drumming sound "human" instead of drum programming like a computer.
Memorizing without listening
A pattern is not the same thing as music. Listen to how the parts interact, then vary them while keeping the groove intact.
Frequently asked questions
Is finger drumming hard to learn?
You can play a recognizable groove in your first practice session. Comfortable timing, finger independence, dynamics, and improvisation take longer because they are physical and musical skills. A step-by-step progression makes them much easier to develop.
Do I need to be an acoustic drummer first?
No. Acoustic drumming knowledge can help, but you can learn rhythm, coordination, drum vocabulary, and musical feel directly on a pad controller.
Can I finger drum with any MIDI controller?
You can experiment on almost any pads or keys, but a responsive velocity-sensitive 4x4 controller is much better for realistic dynamics and two-handed playing.
How often should a beginner practice?
Fifteen to twenty focused minutes most days is more useful than one long, unfocused session each week. Finish by playing freely so the technique becomes part of your music.
What should I learn next?
Continue with hand and finger independence, ghost notes, open hi-hat control, different groove styles, drum fills, and rudiments. Learn the principle behind each technique, then find your own ways to use it.
Dragon Finger Drums is retiring, and public enrollment ends permanently on October 1st. If you want a complete progression from your first pad layout through advanced realistic finger drumming, you can get lifetime access to my complete 35-hour course and workshop library for $100 here.